Getting Started
Functions Companion is an observability, performance and cost management solution for Salesforce Functions. It consists of a Lightning App that gets installed into your org, along with a logging library that the developer uses to instrument their functions source code.
The Lightning App includes Apex Classes that the developer uses to ‘wrap’ their function invocations to gather operational and performance data. Functions Companion also includes an invocation queue and throttle mechanism that enables rate control for asynchronous functions. Data is forwarded to the (external) Functions Companion log processing platform for display in the Functions Companion Lightning Dashboards.
Prerequsites
- A Sandbox or Scratch org with Functions Companion installed.
- A user account for Functions Companion.
If a Sandbox or Scratch org is not yet available, a build script is provided in the repos to build a new one for you.
Connect Functions Companion Logging Platform to Target Org
Be sure you have successfully completed the installation steps and have a running org with Functions Companion installed. If not, review the steps in the Intallation and Configuration guide.
You will also need the username and password for the target org. If you set a password but don’t have it, you can see it again with the following command:
sfdx force:user:display -u <your-test-org-username>
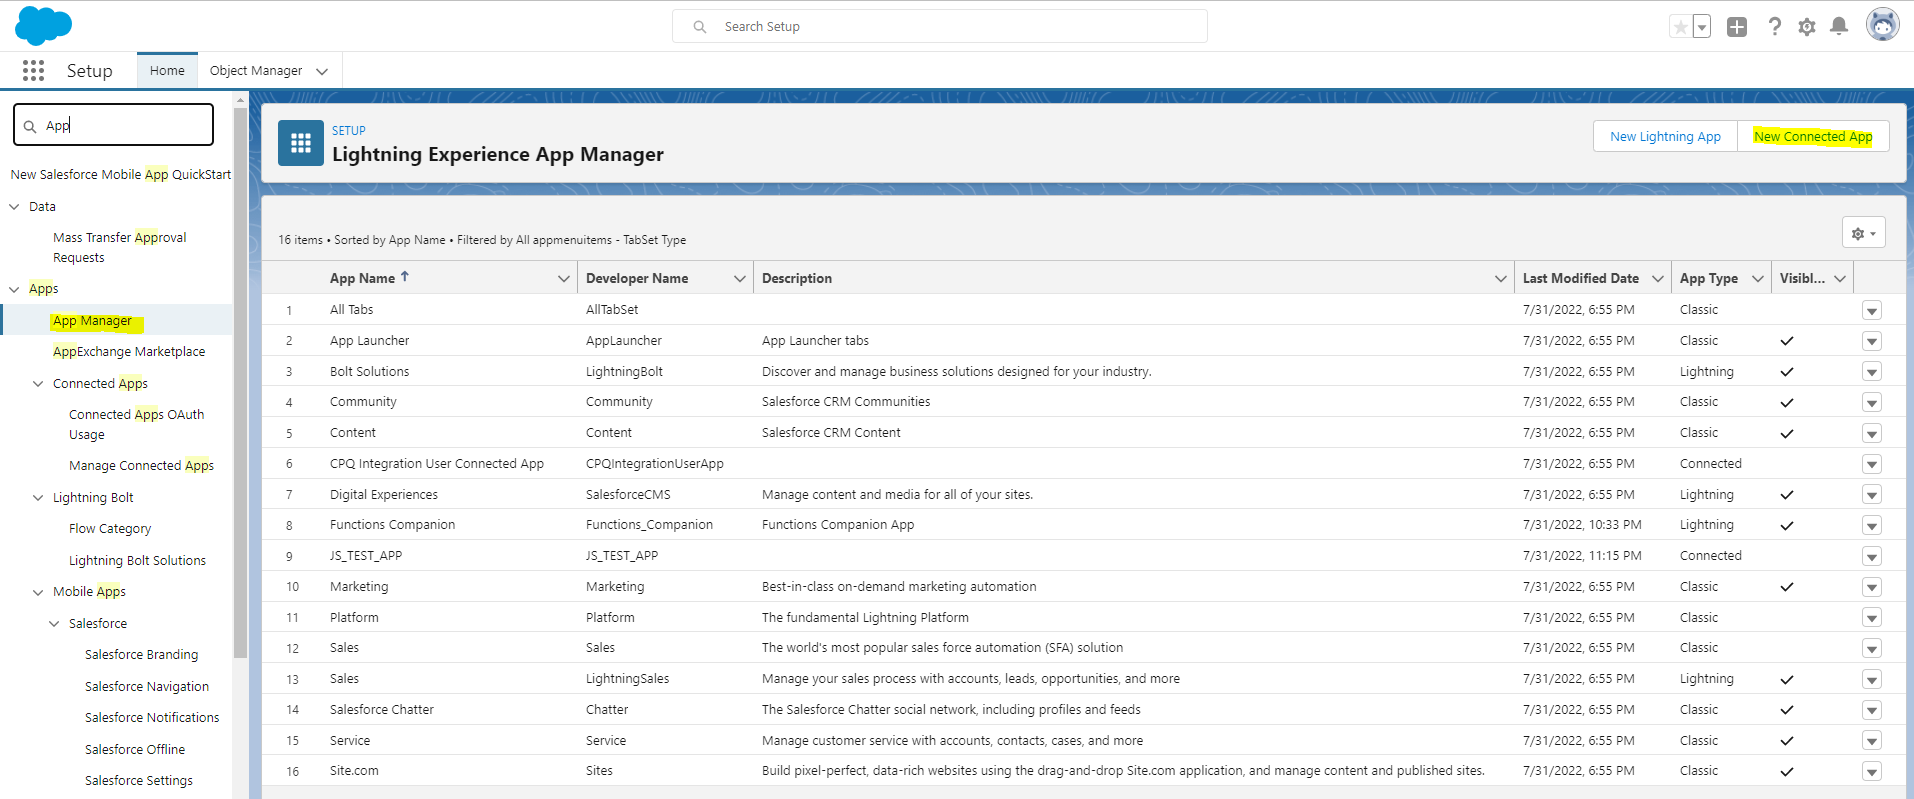
- Begin by creating a Connected App by going to Setup page of the target org and going to ‘App Manager’. Open the target org by running the following command:
sfdx force:org:open -u <target org username>
From the Setup page, open the App Manager page and click ‘New Connected App’.

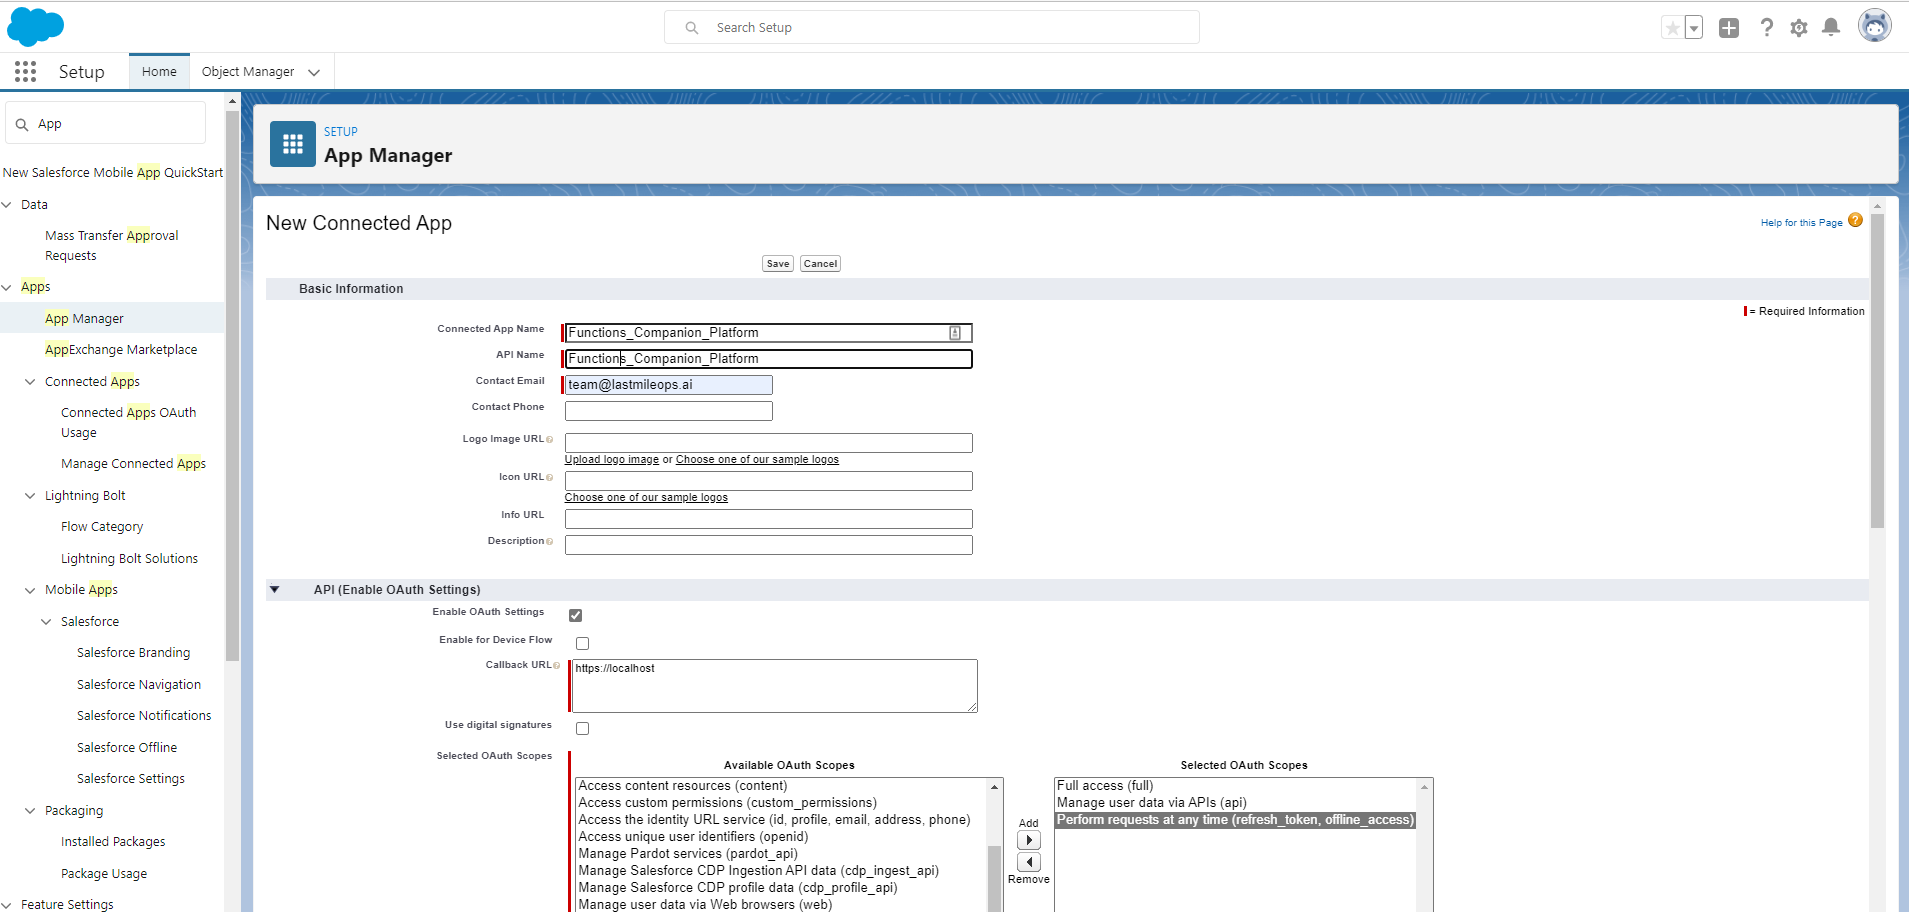
Set up the new Connected App with the following configuration:
- Connected App Name: A name for the Connected App.
- Contact email: (the email address where verification emails will go)
- Check ‘Enable Oauth Settings’
- Callback url: https://localhost
- OAuth Scopes:
- Full access (full)
- Manage user data via APIs (api)
- Perform requsts at any time (refresh_token, offline_access)
- Other values leave as default
 Click ‘Save’, ‘Continue’ then ‘Manage’ then ‘Edit Policies’. Set the following Policies:
- Permitted Users: ‘Admin approved users are pre-authorized’
- IP Relaxaction: ‘Relax IP Restrictions’
Click ‘Save’, then scroll down to the ‘Profiles’ section and click ‘Manage Profiles’ and add System Adminstrator, then Save.
When you are done, your setup should look like this:

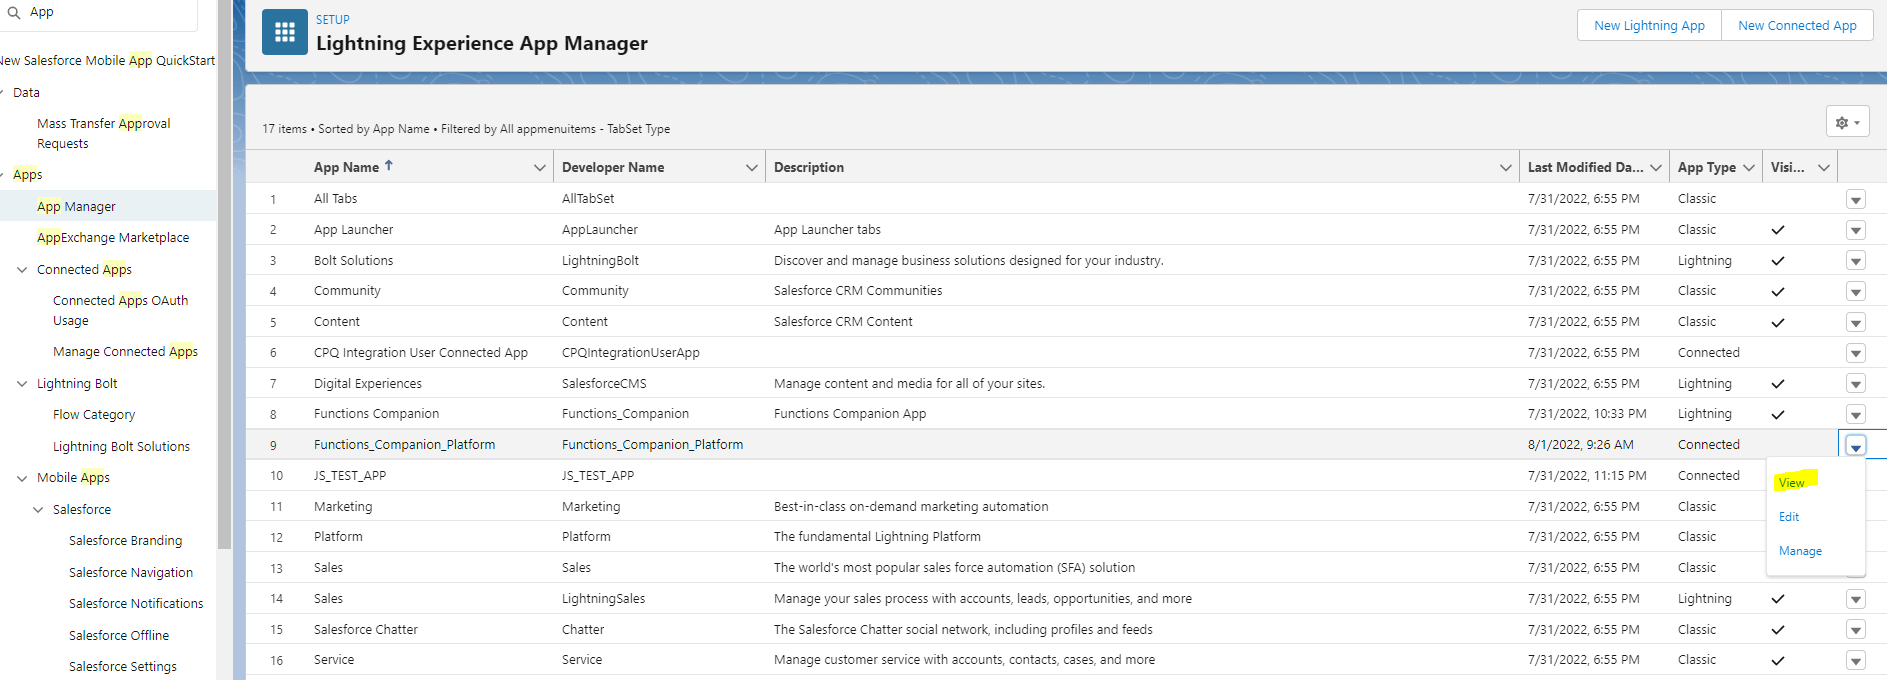
- Go back to App Manager, and ‘View’ the new Connected App.

From the App Page:
- Click ‘Manage Consumer Details’. A verification email will be sent (it might go to Spam folder).
- Verify the account.
- Get Connected App Client ID and Consumer Secret
Keep these handy for the next step.
- Go to the Functions Companion Lightning App and log in to app.lastmileops.ai using your Last Mile Ops credentials. Alternatively, you can go directly to app.lastmileops.ai and log in there.

- Go to the Connection tab and enter the connection details
- Connection Name
- Description
- Instance url from target scratch org (Be sure to use the my.salesforce.com domain in the instance url)
- Username and Password from scratch org (generated from installation step)
- Client Key and Client Secret from Connected App
- Save the Connection details and an API key will be generted. Copy the API key.

- Go to the ‘Configure’ Tab and insert and update API Key.

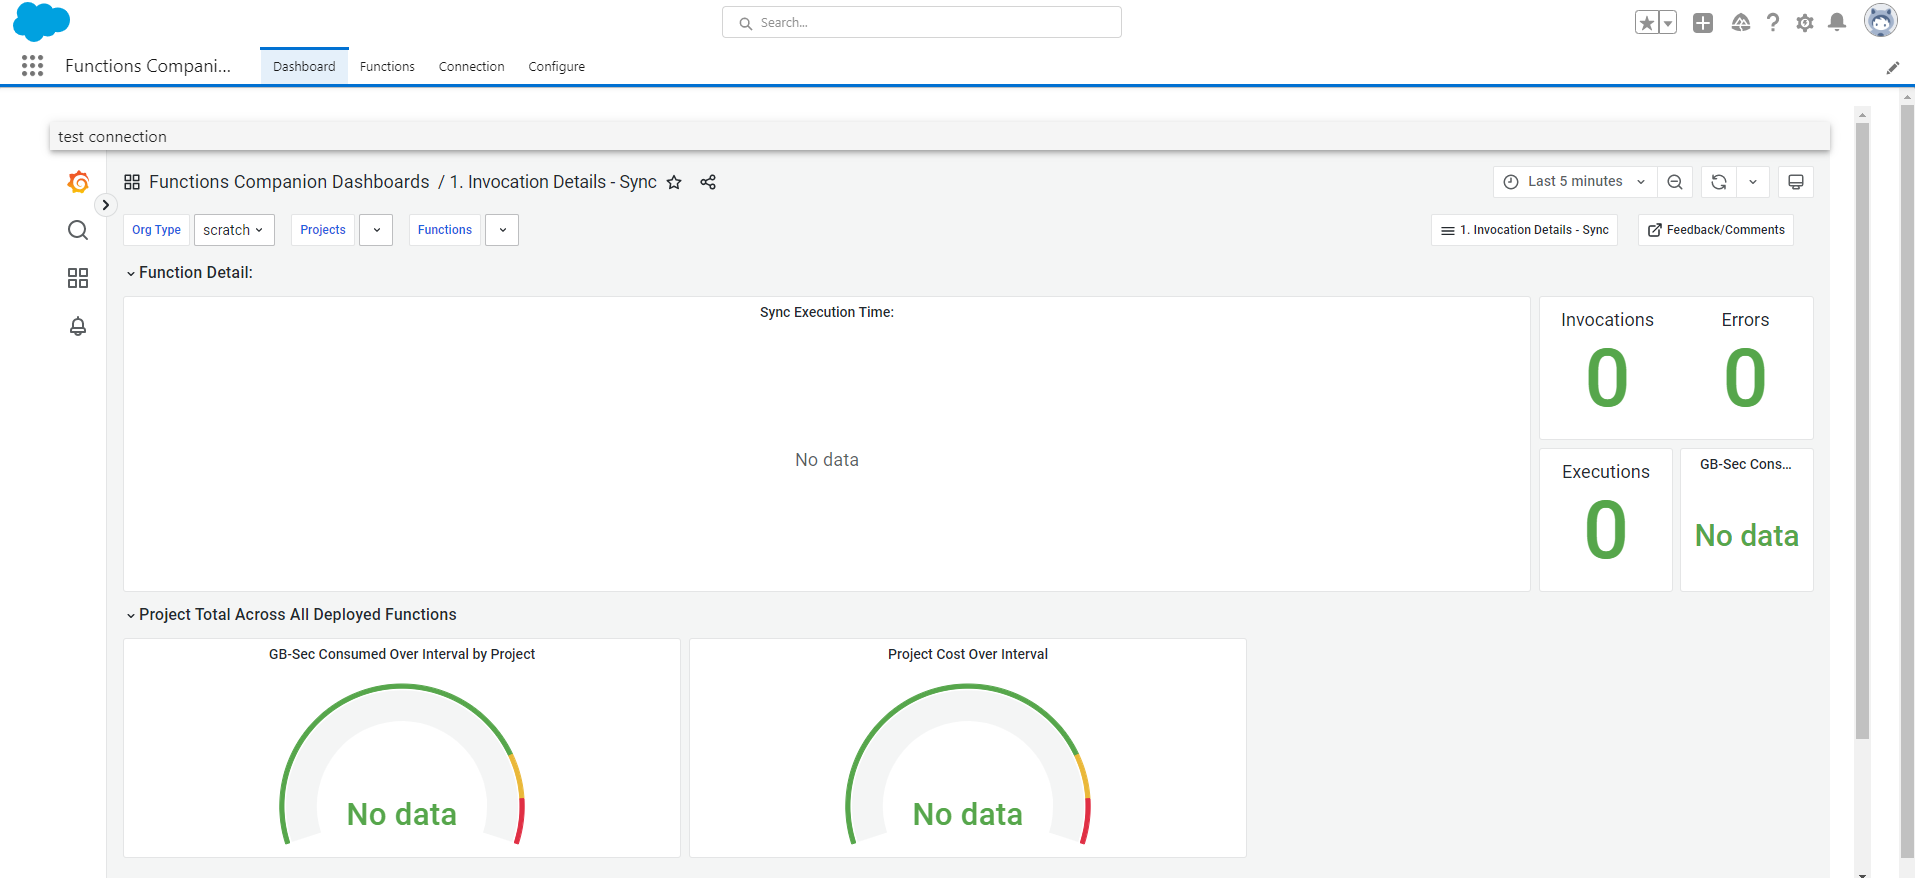
Once the API key is set, you should be able to go to the other tabs and see an empty Dashboard and Function Tabs
- Deploy some functions
With the Functions Companion platform authorized as a Connected App with an API key, you should now be able to deploy a Project with some functions and run some test invocations using the scripts in the test repos (i.e. JavaScript_Tests and Java_Tests).
